Showing posts with label wedding diy. Show all posts

Saturday, November 15, 2014

Wedding DIY Project: "Mr & Mrs" Hanging Sign

Here is a really easy project for what I think is one of the cutest decorations to have at a wedding, a "Mr & Mrs" sign.  Again, I was surprised to see how expensive these signs seemed to be.  And I also thought most of them looked pretty boring.  I thought, "I can easily make this on my own and then I can also customize it to match my colors!"  So I headed to Michaels, but all they had were really large wooden letters and really small wooden letters.  I wanted something large, but since I wanted this to hang off the tablecloth of our sweetheart table, I was afraid the large wooden letters would be too heavy.  I figured cardboard would be the best.

So I hit the internet and found a person on Etsy who does customized cardboard letters in many different fonts.  I also asked for a heart that was slightly larger than the & sign so I could fit the & on top of it.  It worked perfectly!  You can find the artist here.

wedding sign


 For this project you will need:
  • letters and heart
  • twine
  • paint
 Step 1
Get your letters.  As stated above, I wanted lightweight so I found someone on Etsy who cuts out letters on cardboard (go here) but if yours doesn't need to be, you can find wooden ones easily.

Step 2
Paint the letters and heart.  Since I knew mine would be in front of the colored tablecloth, I thought white would be great to stand out.  But I wanted the heart and "&" to be special so I used our two colors on those.  Luckily one of my colors was pink but any colors will work!

Step 3
After the paint has dried, attach the twine.  I didn't want the twine going through the letters, so I cut twine to go between each letter and hot glued it to the letters.  I think that looks nice.

And voila!  Easy!

Saturday, November 8, 2014

Wedding DIY Project: Birdcage Card Holder

One thing that I had seen a lot of when looking at wedding ideas was antique-styled birdcages for guests to put their cards (for those that don't have a large gift) into.  I loved the idea, it's so beautiful and works perfectly with the classic garden wedding theme that we had.  But when I started looking at birdcages to buy, I was flabbergasted at the prices.  Most start at $30 to $40, a lot come in a pair (why you would need two, I have no idea!).  These were from websites that sell wedding items and it is a particular theme you'll notice that anything dealing with weddings, the price gets hiked up.  So it's always better, when you can, to shop for things not on a wedding site or the wedding section.

But even when I tried searching at other places for birdcages I found that 1.) they're actually hard to find, especially ones that have enough space for large cards to fit through and 2.) the ones I did find were almost just as expensive!  I knew I would have to get one at Michael's because, at the very least, I could use one of their weekly 40% Off coupons and a $30 birdcage would be cut down to $18 (See Wedding Decorations, Michaels Coupons).  I found a birdcage I liked, but I didn't like the drabby gray color it was.  So I kept searching . . . uneventfully.

Then it dawned on me: spray paint!  Duh!  I went back to Michaels and the birdcage was actually 50% off so I got it for only $15!  (I guess it paid to wait this time)

Here's how it turned out:

wedding card holder

To do this project you'll need:
  • a birdcage (get it cheap!)
  • spray paint (if you don't like the color)
  • pretty paper (to line the bottom)
  • ribbon
  • "cards" sign

Step 1
Paint the birdcage if you need to.  This may take several coats.  You may want to add a clear gloss coat on top if you want that shiny look.  I liked the kind of weathered (but clean) look the spray paint itself gave so I didn't do this.

Step 2
Once dry, flip the birdcage upside down and take a make a template of the bottom with scratch paper.  Then use the template to cut out your paper to line the bottom and make it look pretty.  I would suggest wrapping paper so it's wide enough to fit the bottom without multiple pieces and having edges.  I'd also suggest the paper be one of your colors and the ribbon be the other color.

Step 3
Place the paper on the bottom of the inside of the birdcage.  You may want to secure it down with double sided tape on the bottom of it.

Step 4
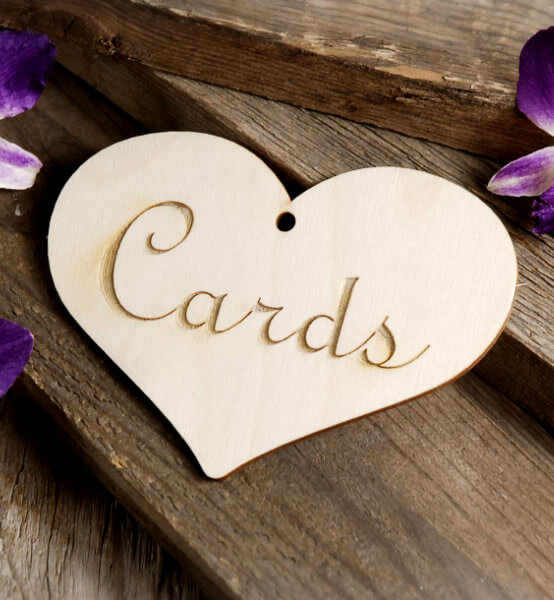
Make or find a "cards" sign.  I got this one from one of my favorite sites:
Wood Heart "Cards" Sign 5in


Step 5
Cut the ribbon to fit around the top of the birdcage.  You can also do some weaving action between the spokes if you want.  And attach the card sign.


Easy!

I really love how my birdcage came out better than any of the other ones I saw and I spent less on it!

Wednesday, November 5, 2014

Wedding DIY Project: Picture Frame Seating Chart

Now that you have your table numbers made (See Wedding DIY Project: Vase Table Numbers) you need to have a way to show your guest where there seat is.  This is an easy way to make a fun seating chart using a picture frame.

wedding seating chart


All you need for this project is:
  • a picture frame (a poster size is your best bet)
  • plywood strip
  • small wooden letters
  • wooden decorations
  • small hook screws
  • twine
  • paper
  • mini clothespins
  • paint
  • glue

Making the Sign
Step 1
Determine the length needed to fit all the letters and any decorations and that looks good with your frame size, and cut it to that length.

Step 2
Paint the plywood, letters, and decorations.  Three colors work nicely for this.  If you only have two main colors, white is always a good go-to for weddings as well as silver or gold.

Step 3
After the paint has dried, glue on the letters and decorations to the board as desired.


Making the Rest
Step 1
Glue the sign to the top of the frame.

Step 2
Determine the height needed for your table pages to hang from and screw in the hooks to the inside of the frame appropriately.

Step 3
Tie twine to each hook to string across and cut

Step 4
Print out a list of names for each table and cut to size and attach to pretty paper

Step 5
Pin up the table lists with the mini clothespins


*Note: I wanted the table lists to be hanging freely with no backing on the frame, but whoever set it up at my wedding didn't realize this so that choice is up to you.  I think it looks good either way.

 
Tips on Choosing a Frame
When choosing a frame, I went with a simple white one but if you want a fancier look, go with an antique looking ornate gold or silver frame.

Large frames can be expensive, and this is supposed to save you money, so make sure you look for a good deal on it!  Check out thrift stores for antique ones (you can buy an ugly painting just for the frame) or if you want a more simplistic one, you can go to Michael's but make sure you go during a frame sale or use their weekly coupon! (See Wedding Decorations Michaels Coupons)

Monday, October 27, 2014

Wedding DIY Project: Vase Table Numbers


A lot of brides think that making your wedding DIY (Do It Yourself) can save you a lot of money.  This is not always the case.  Many projects, especially for those of us not necessarily crafty, take a lot of time and make frustration, things go wrong and you end up buying more, etc that actually make it end up costing more than buying it premade or having someone else do it.  BUT there are some projects that can save you a lot.

One thing I was surprised to see had such a high price tag were table numbers.  These are such simple things, but even ones that were just a number printed on paper were outrageously priced (plus boring).  I knew this was a project that could easily be tackled because it doesn't involve much, and you don't have to make hundreds of them.

For my centerpieces, I knew I wanted a small vase with some flowers in them.  In order to keep things even and centered (I'm OCD like that), I didn't want the vase and table number competing for the centrally located spot, so I decided to combine the two.  I thought, "Wouldn't it be cute if the table number was sticking up in the vase on top of the flowers?!"  So I went to work.


All you need for this project is:
  • wooden dowels
  • wooden numbers
  • hot glue
  • paint
  • you can add decorative stuff like glitter, ribbon, lace, etc if you want but I chose not to so as not to distract from my flowers

Step 1
Glue the numbers on top of the dowels

Step 2
Determine the height needed for your vase, and cut the dowel appropriately

Step 3
Paint the table number

Step 4
Add any decoration


That's it!  Easy right?!  And it only costs a couple dollars total to make all of them!